OpenID Connect configuration
IMPORTANT
Oktomusic delegates all user authentication to an external OpenID Connect Provider.
The main reasons are:
- Simplicity in the application architecture
- Delegate accounts security to specialized software
- Give full control for user management to the administrator
- Leverage existing battle-tested identity management solutions
OpenID is a widely adopted standard with many availlable providers:
NOTE
For an introduction to OpenID Connect, please refer to the official documentation: How OpenID Connect works.
- Oktomusic is a OpenID Connect RP (Relying Party)
- It delegates all user authentication to an external OpenID Provider (OP)
- It uses Authorization Code Flow with PKCE and server-side sessions
- It relies on OpenID Connect Core and OpenID Connect Discovery protocols
Keycloak
When using Keycloak as OpenID Provider, you can follow these steps to create a client for Oktomusic.
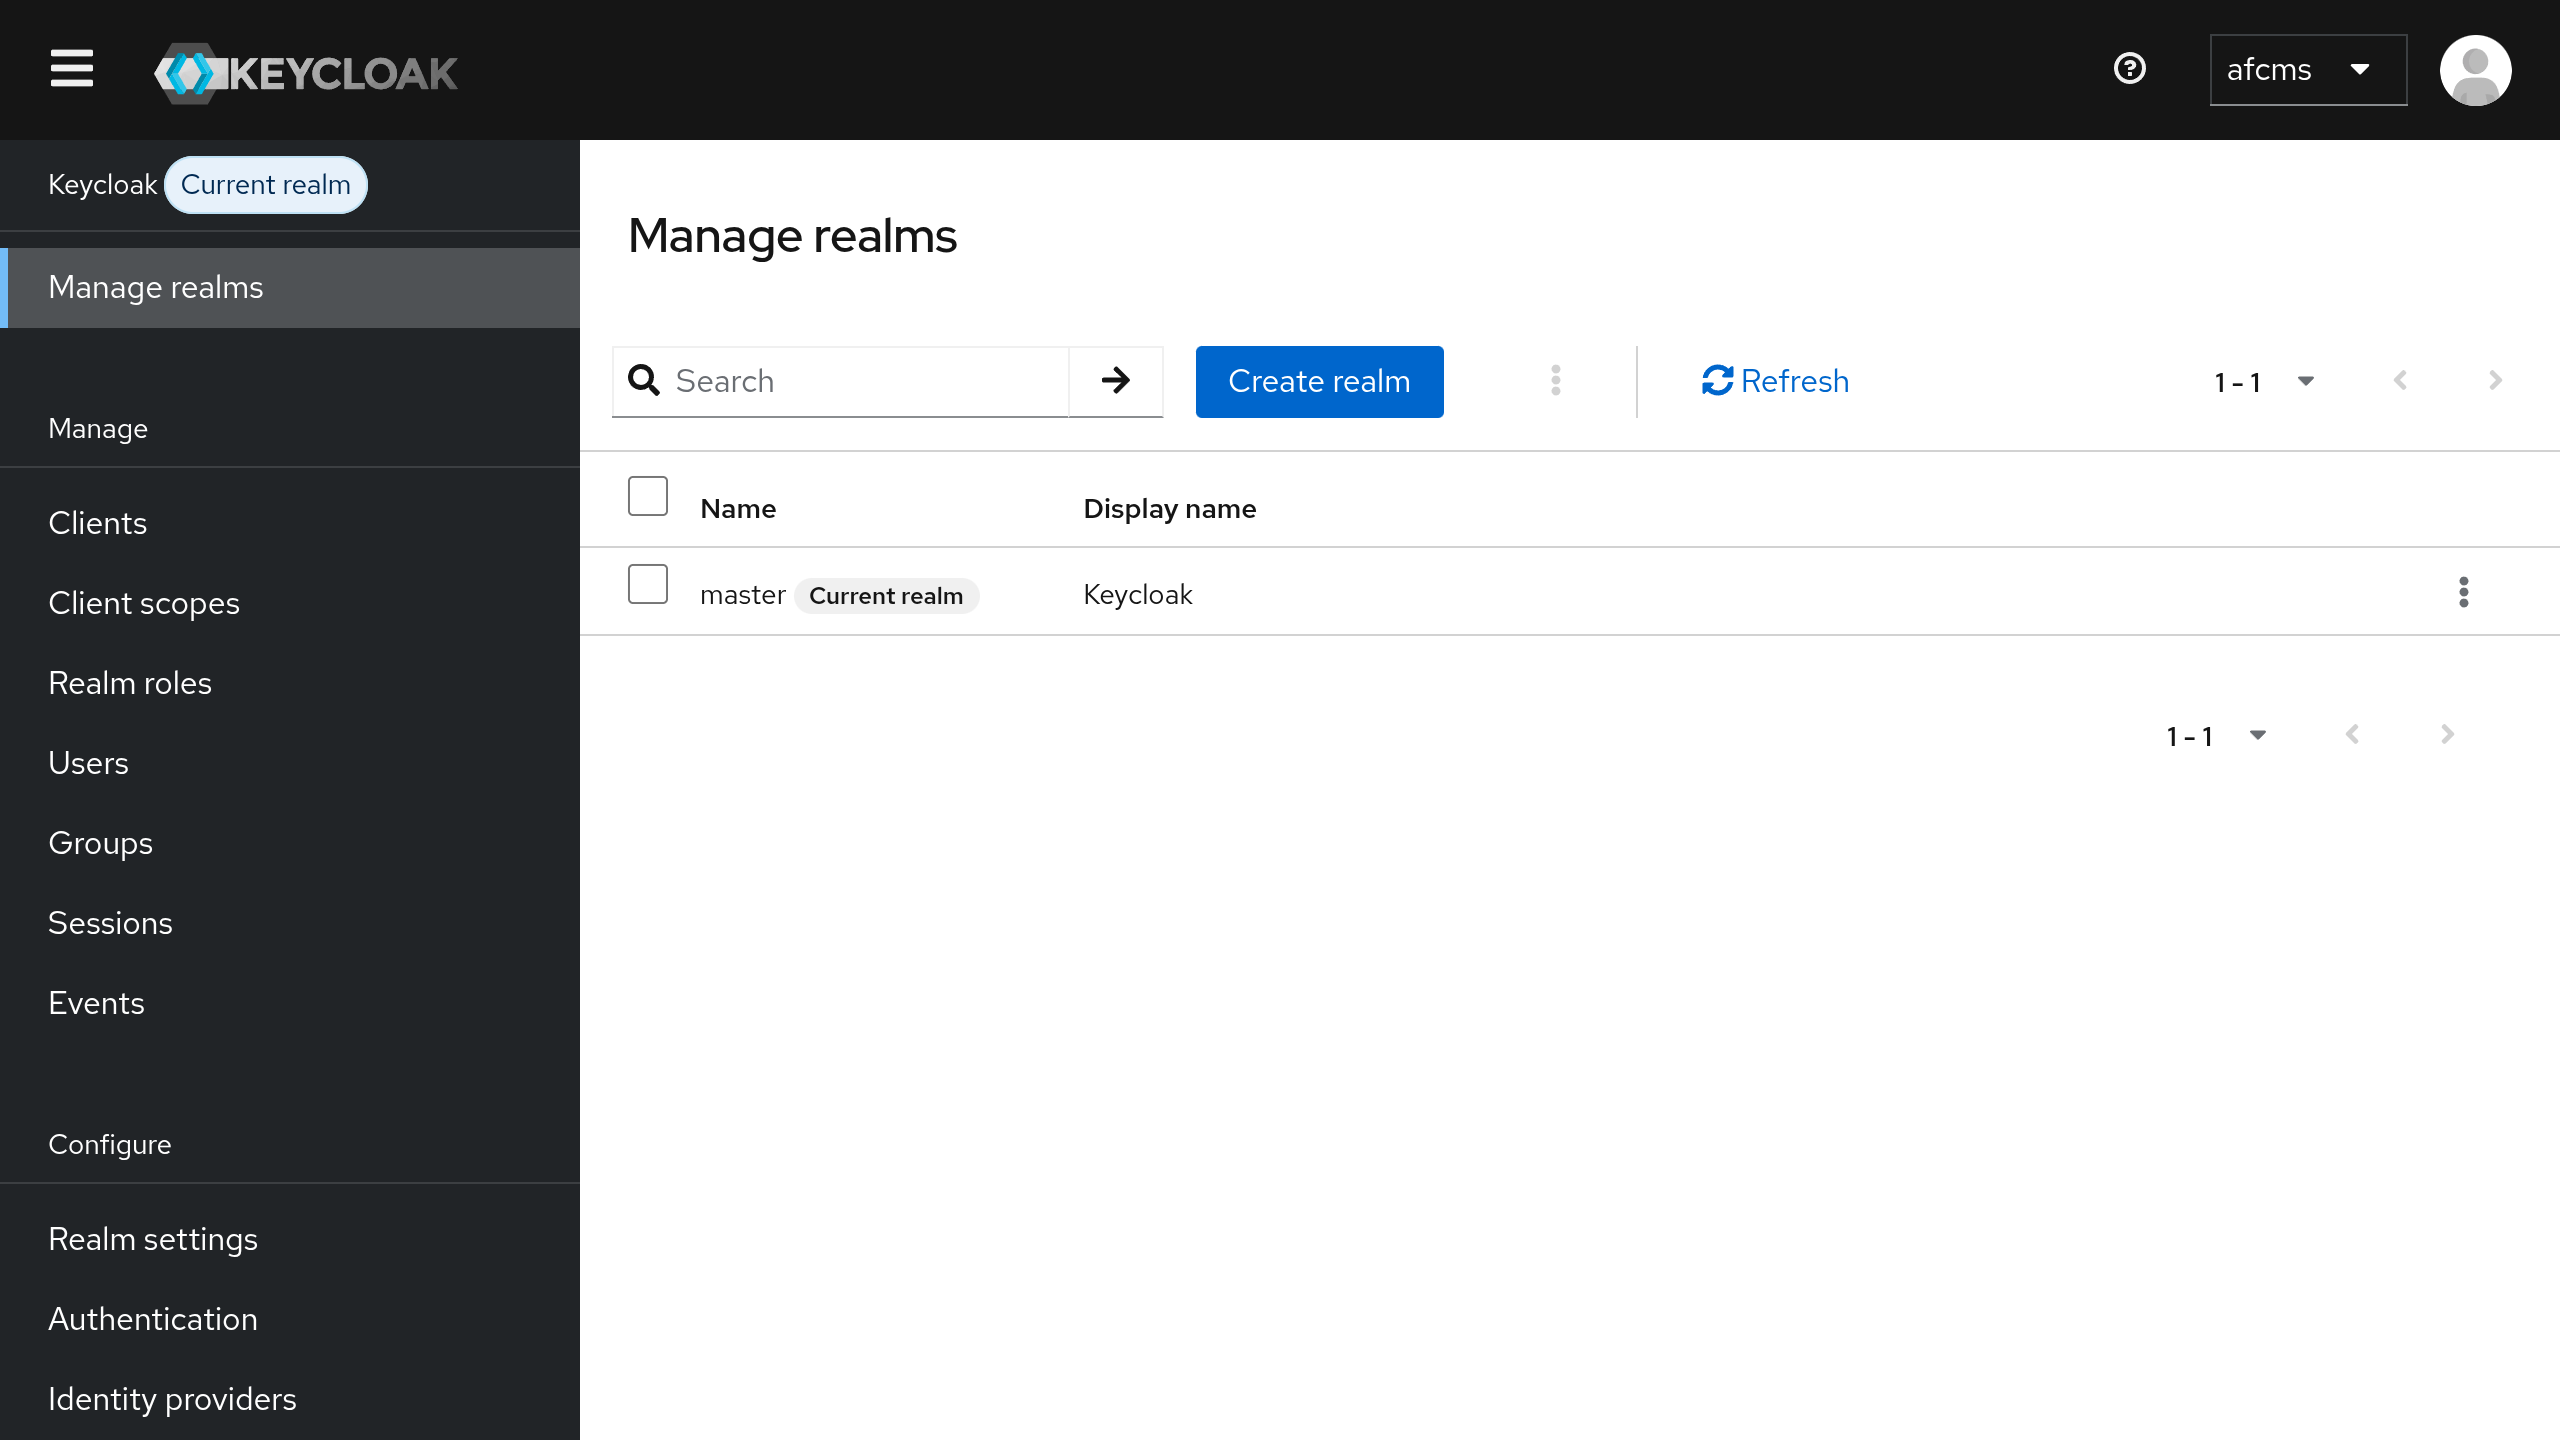
Login to Admin Console
Keycloak use realms to isolate different environments.
The default created realm is master, regardless if you create a new one or not, the realm name will be needed to configure Oktomusic later.
Create a new OpenID Client
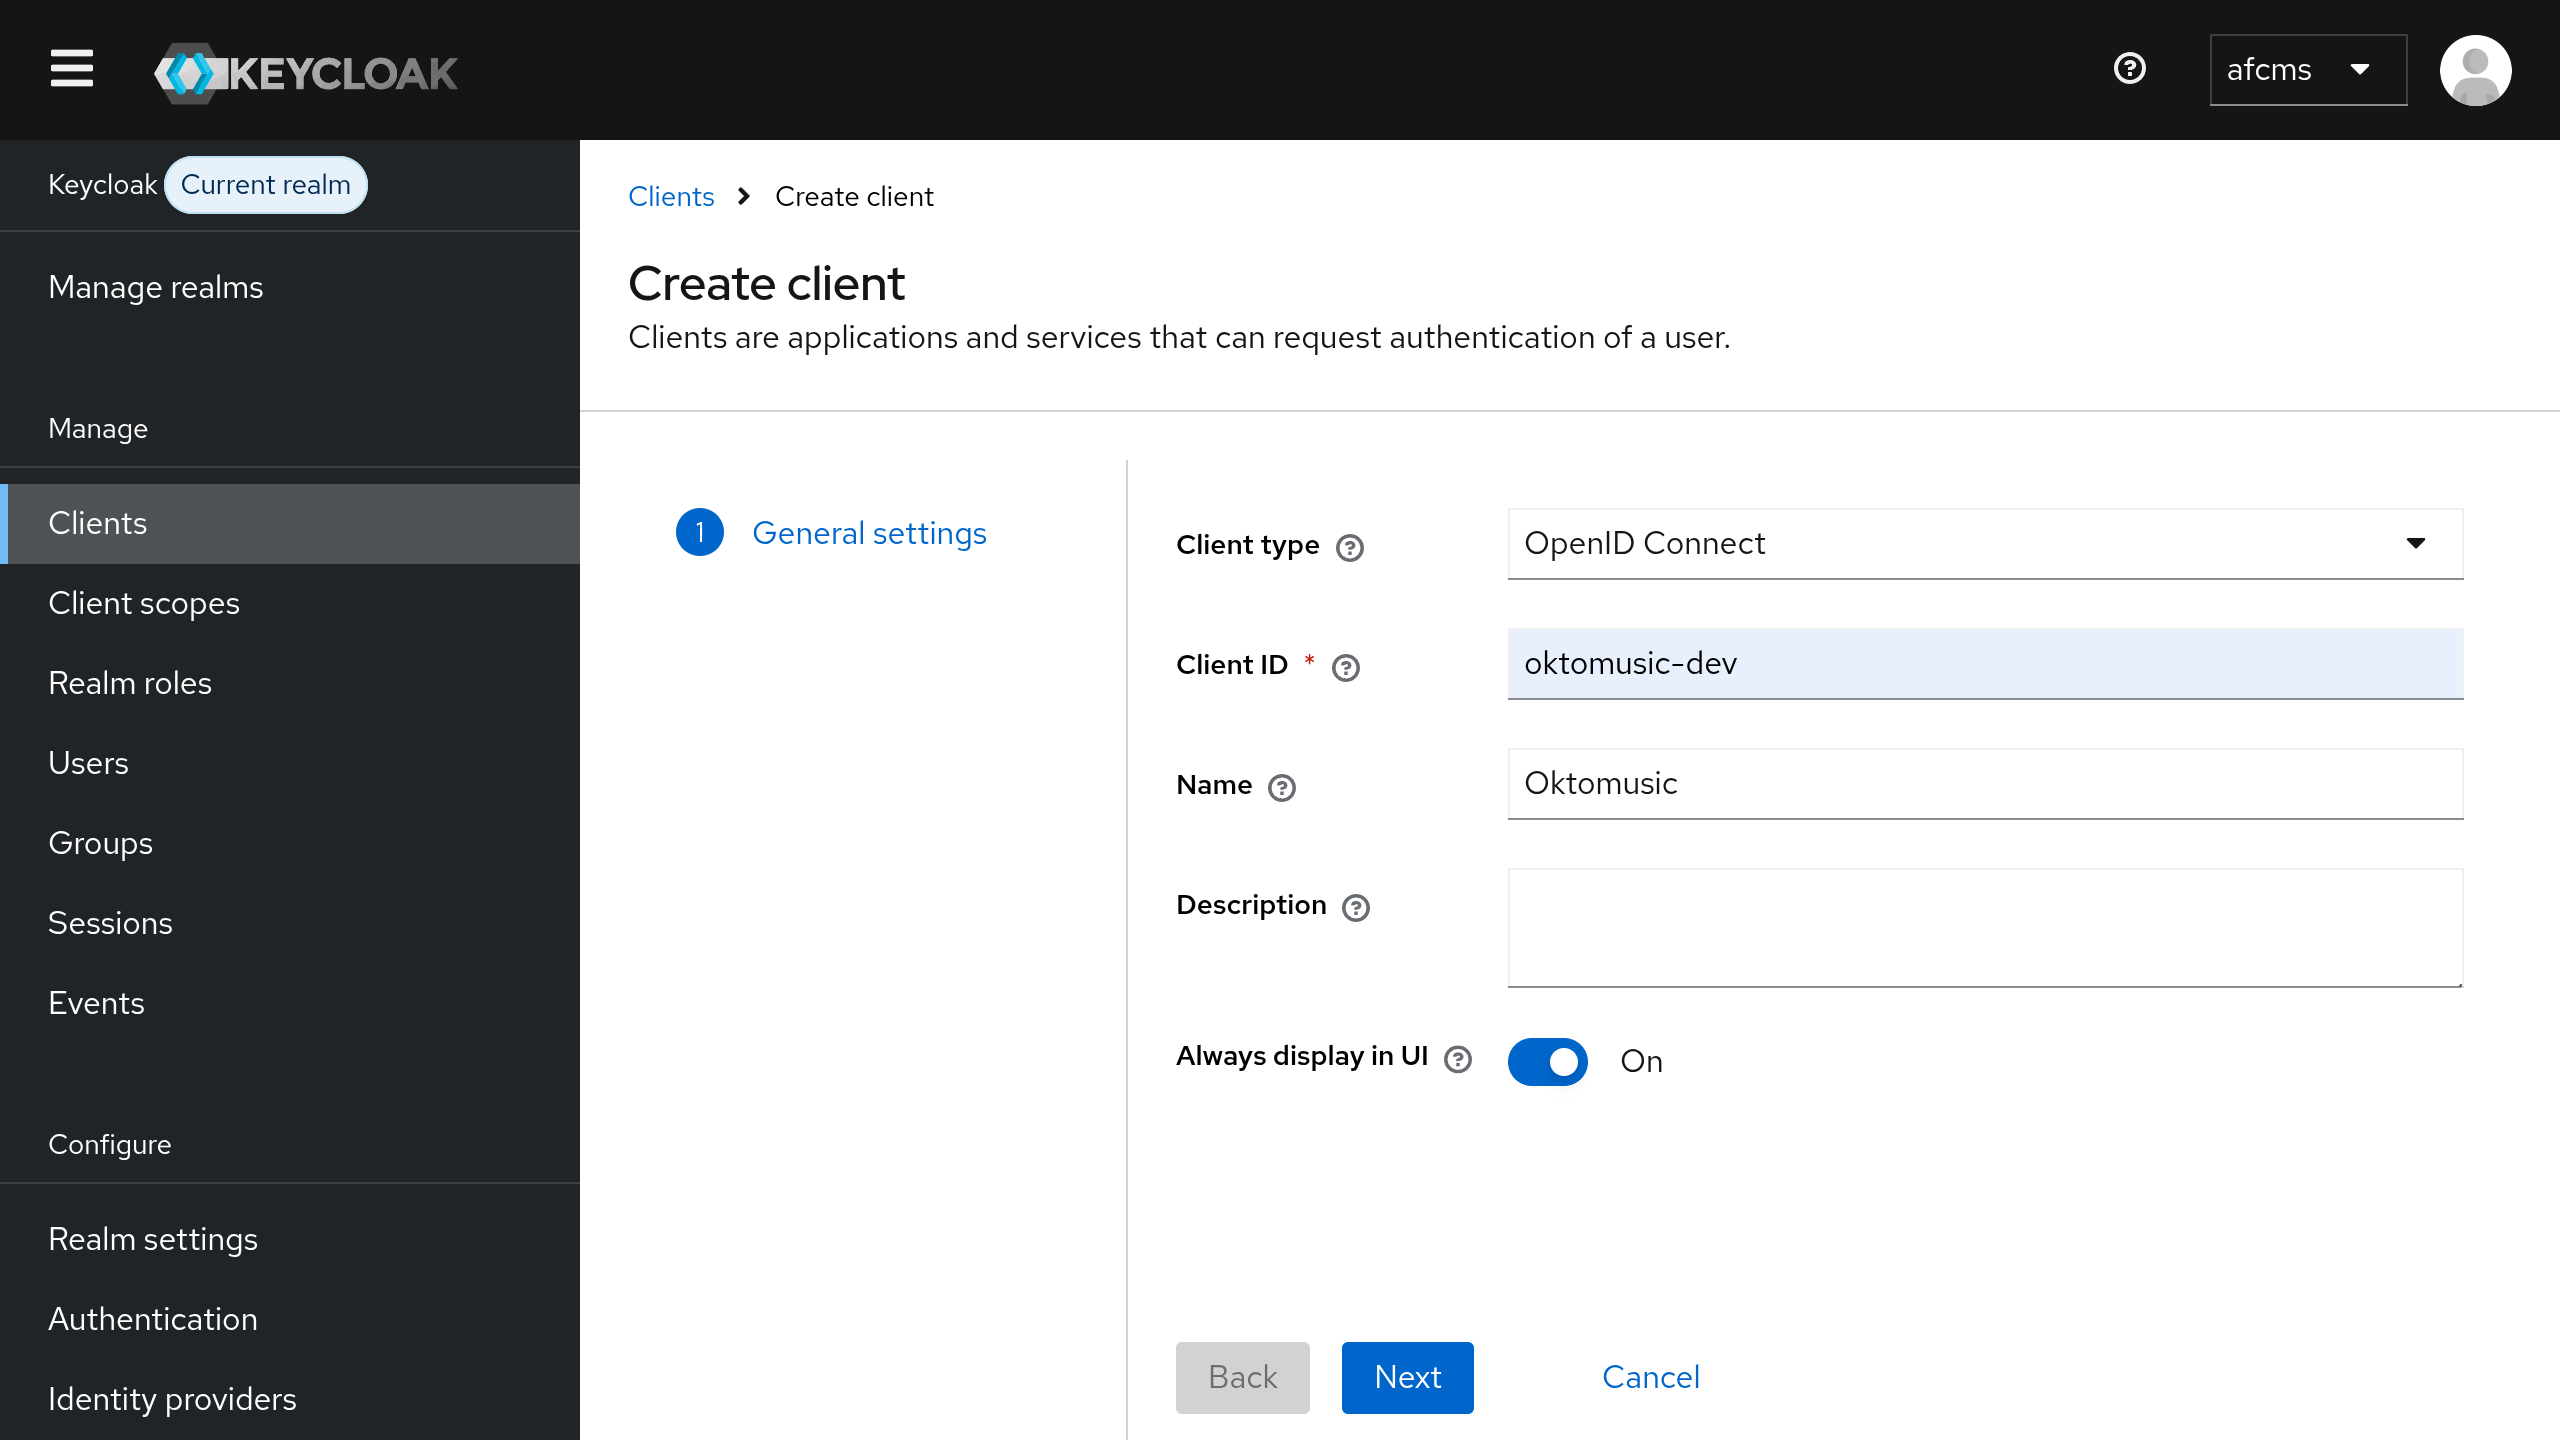
Now you can go to Clients > Create client to create a new OpenID Client.
- Keep
Client typetoOpenID Connect - Set
Client IDto a realm-unique name that will be used in URLs, such asoktomusic(or any other name you prefer) - Set other options as you prefer, then click
Next
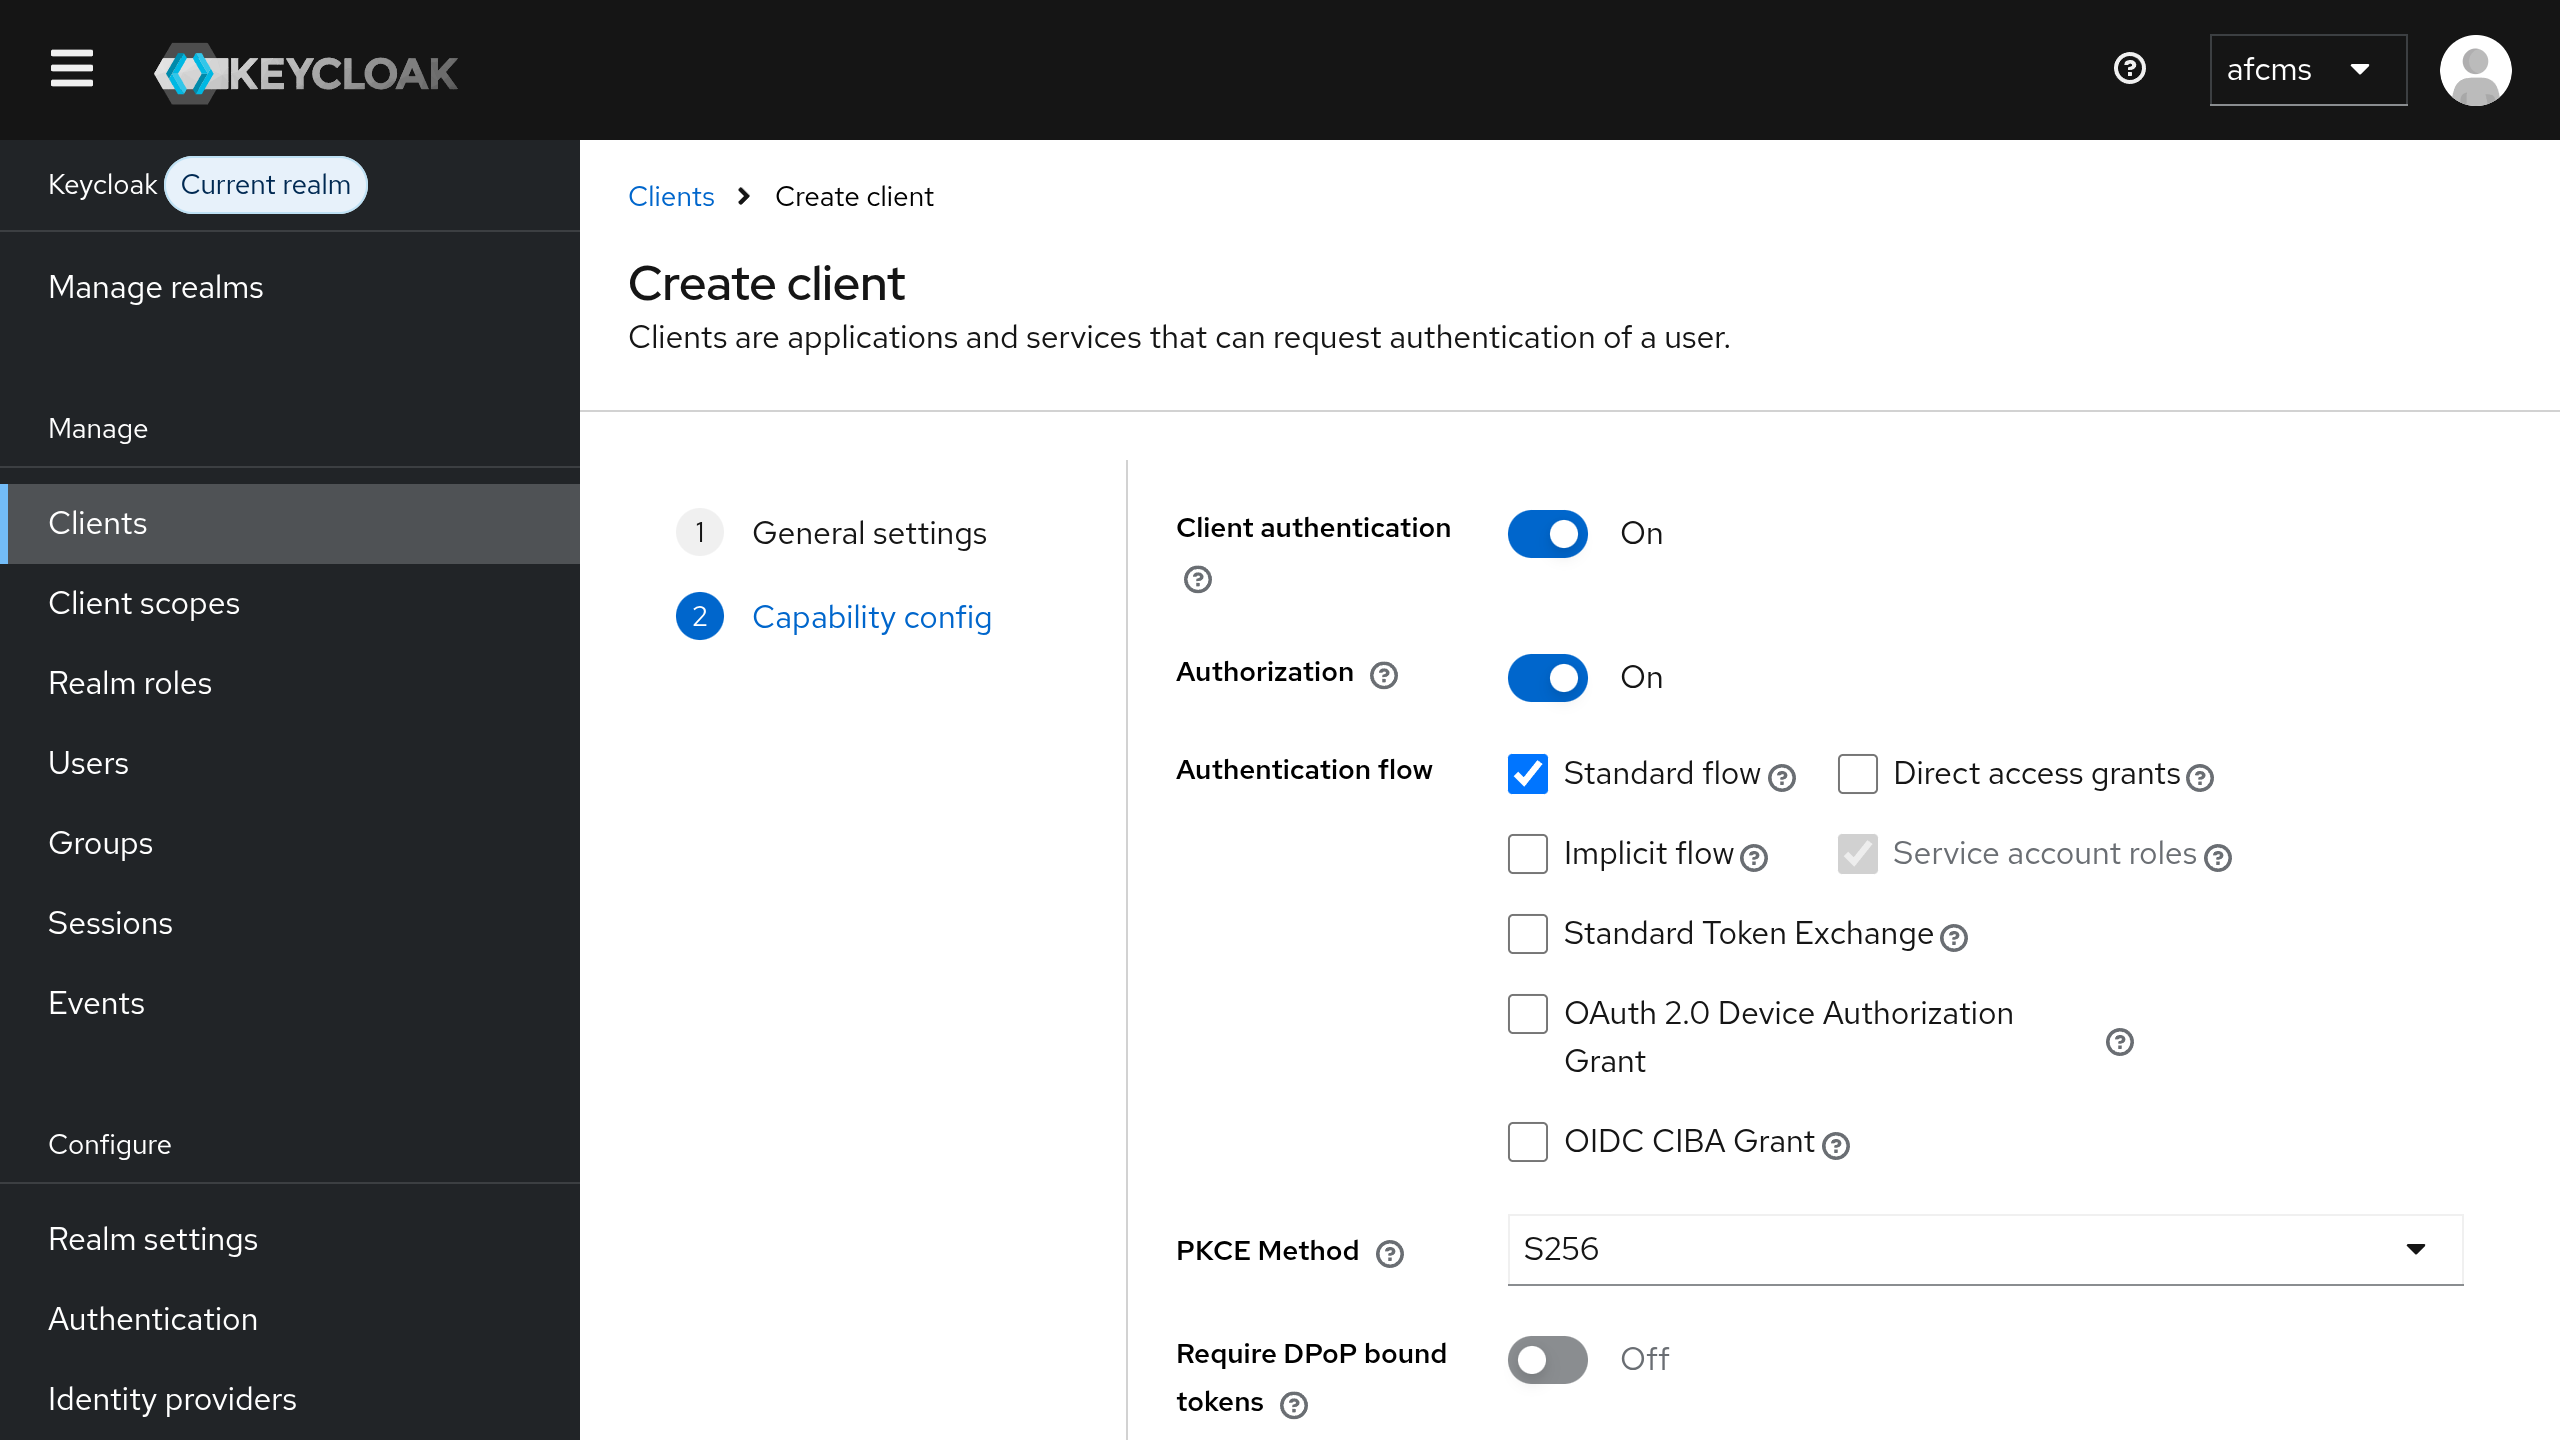
- Switch
Client AuthenticationtoON - Switch
AuthorizationtoON - Set
PKCE MethodtoS256 - Click
Next
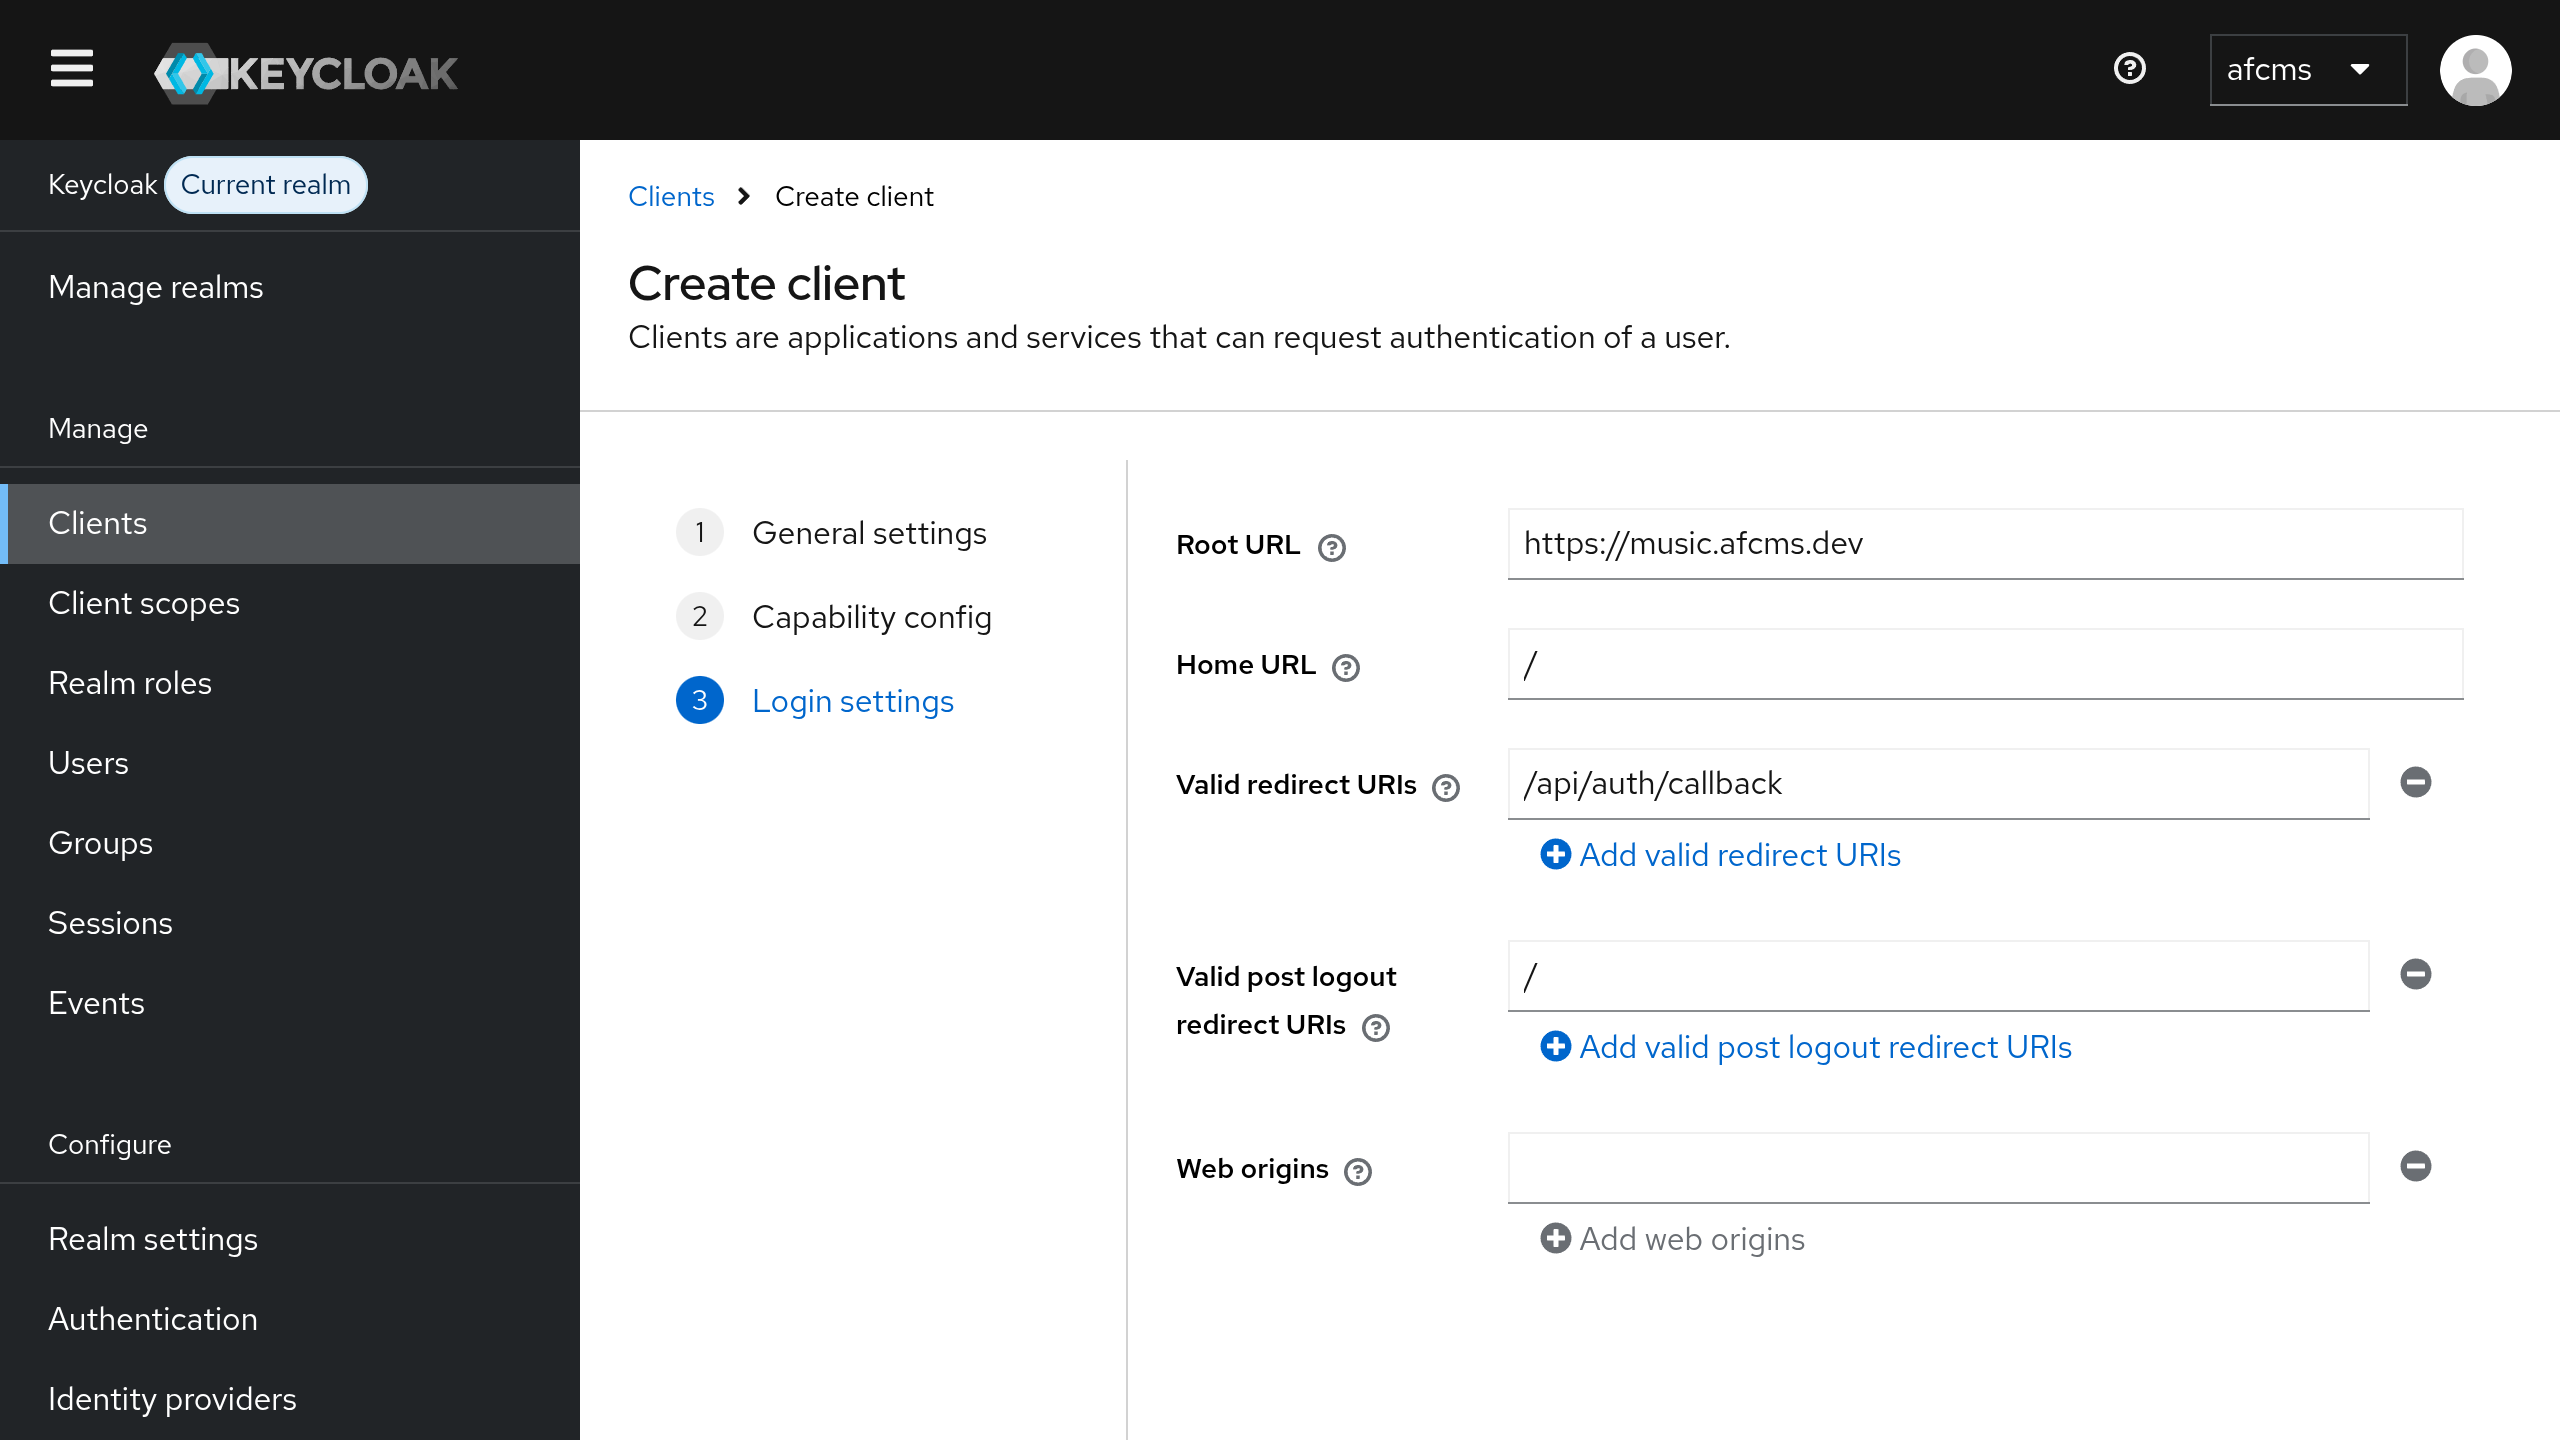
- Set
Root URLto your Oktomusic base URL, e.g.https://oktomusic.example.com - Set
Home URLto/(relative to the base URL) - Add
/api/auth/callbacktoValid Redirect URIs - Add
/toValid Post Logout Redirect URIs - Click
Save
Create Roles
The app relies on two specific roles to manage access control. admin and user.
There are multiple ways to provide roles to clients, here we will create them as Client Roles to assign manually.
You can create mappers to automatically assign client roles based on user attributes or groups later if needed.
- Go in your client page, then click on the
Rolestab - Click on
Add Roleand add a role nameduser - Go back and add another role named
admin - This time in the role settings go to the
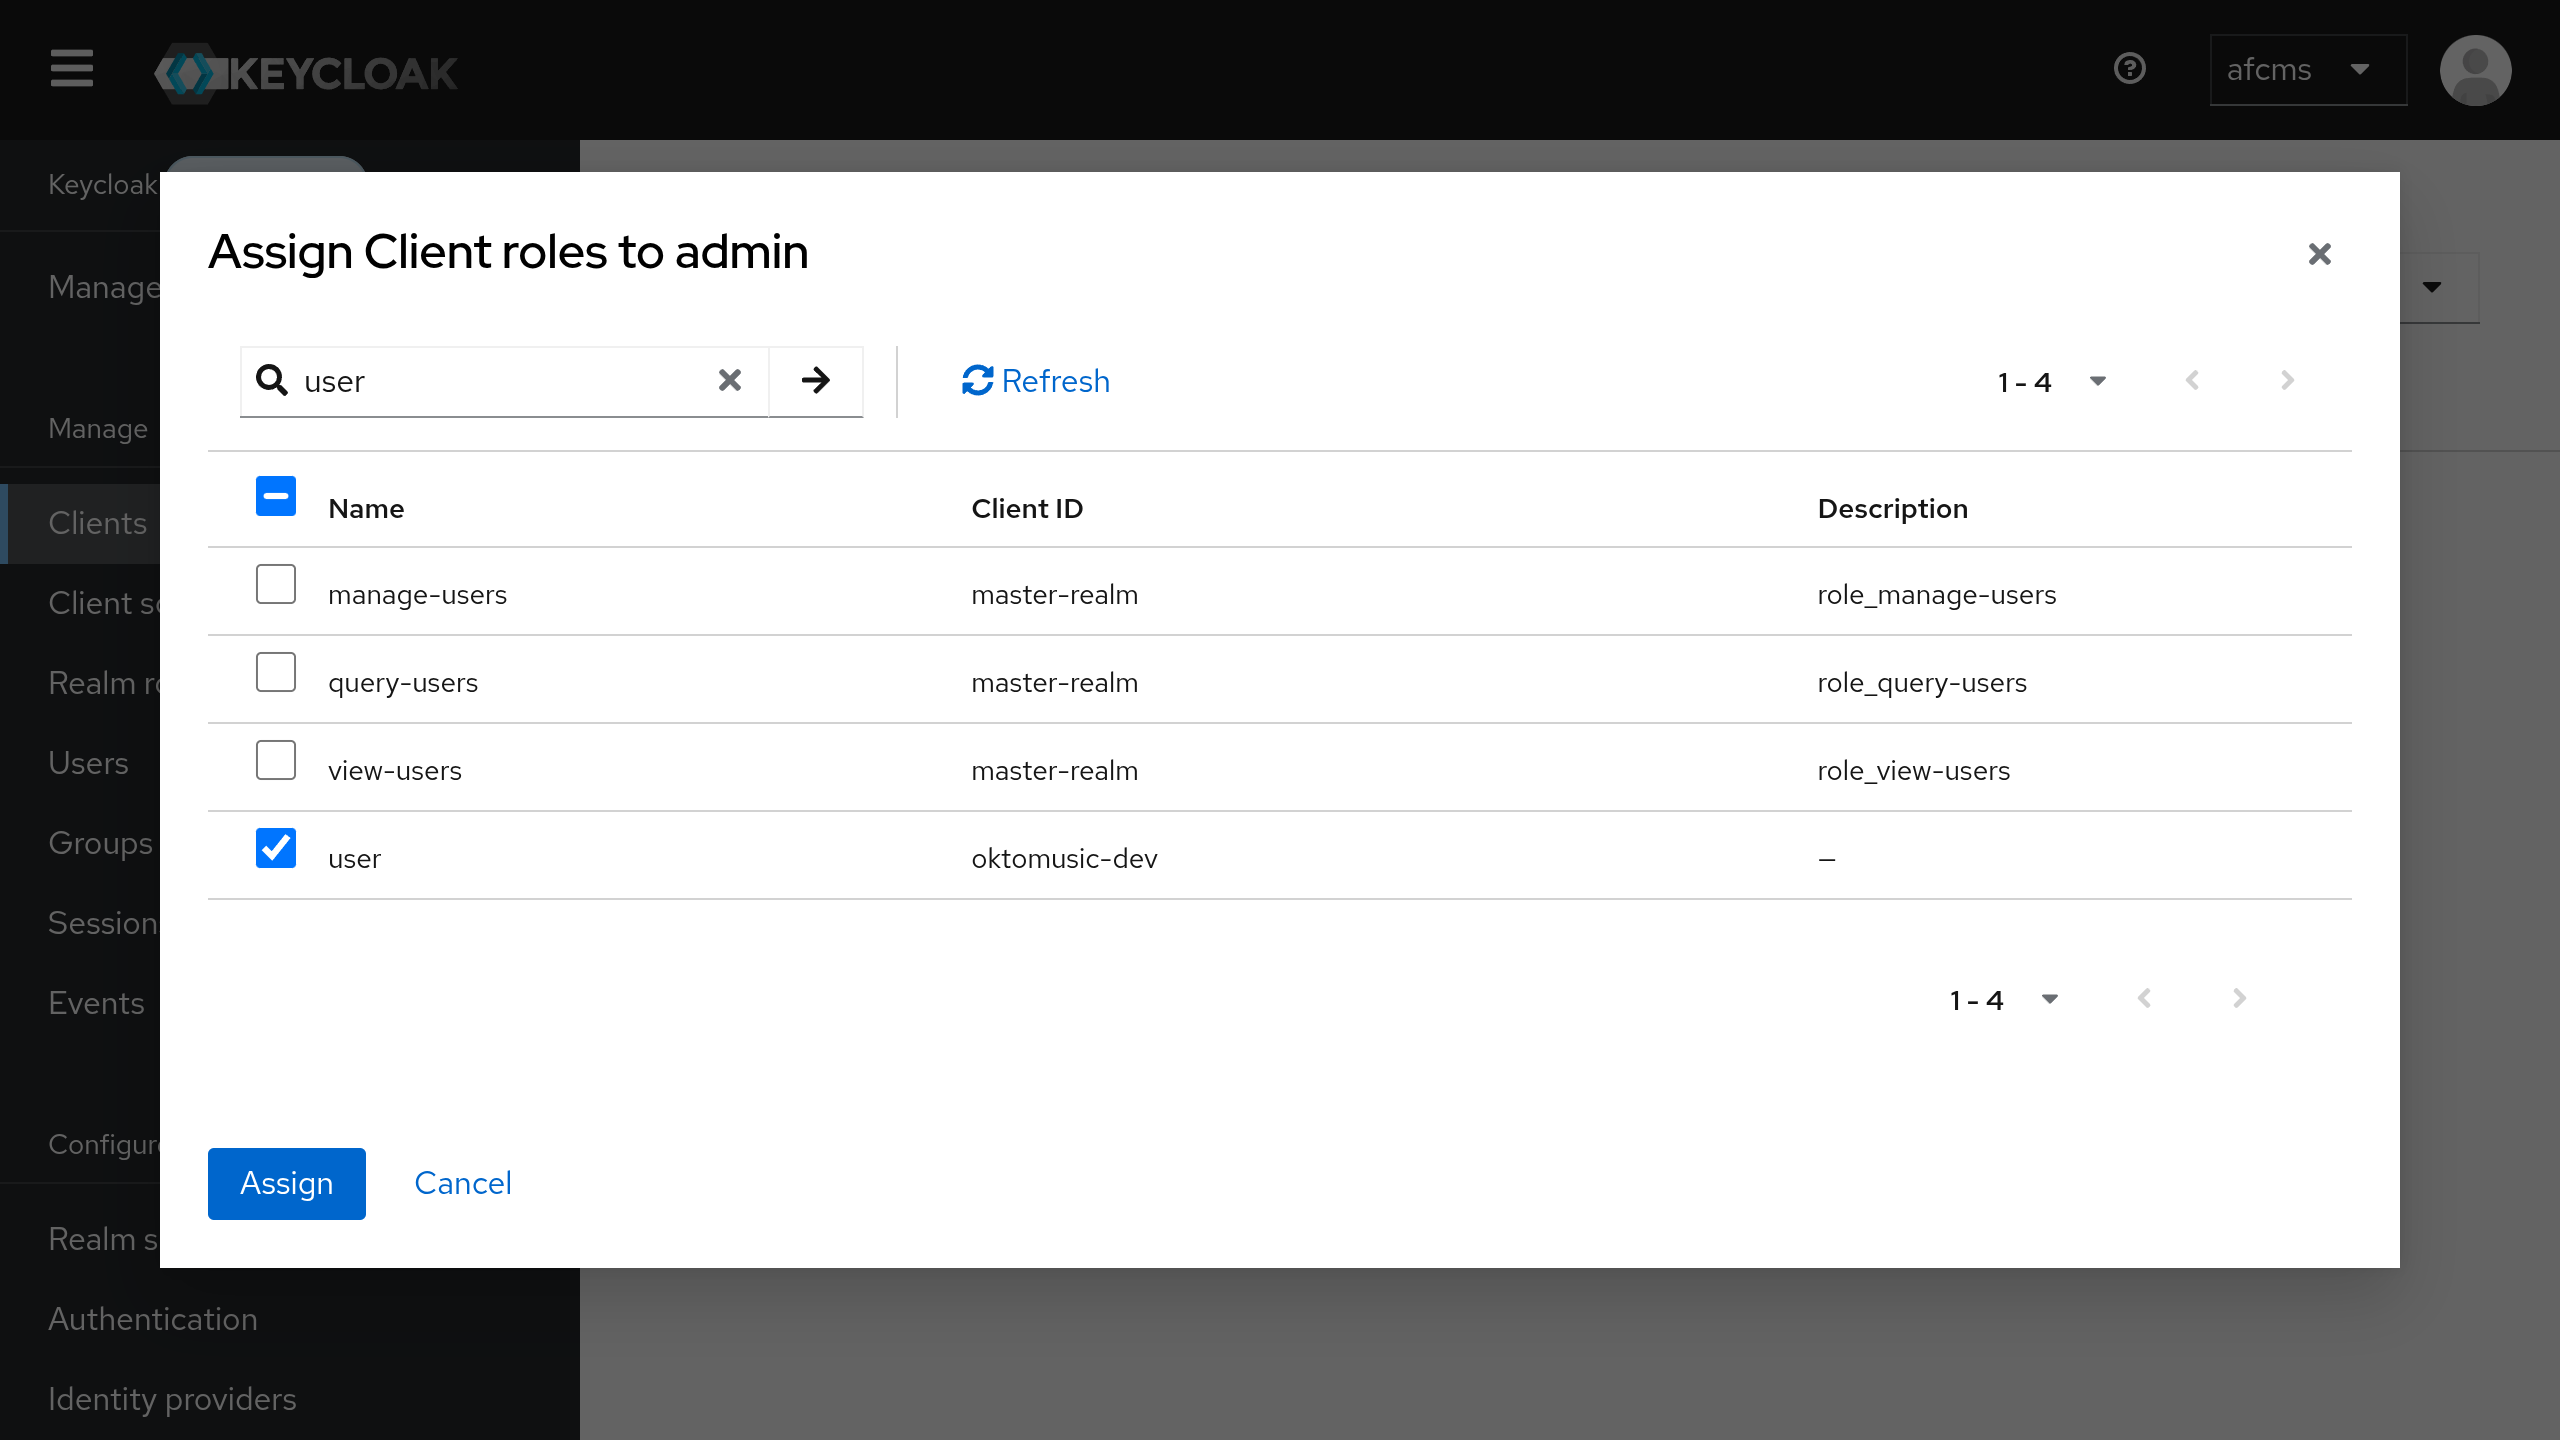
Associated Rolestab - Assign the
userrole as an associated client role ofadmin - In the role list the
adminrole should be displayed as composite now
Configure Oktomusic
# URL of the Keycloak realm
# Constructed from your Keycloak domain and realm name
OIDC_ISSUER=https://<keycloak-domain>/realms/<realm-name>

# Client ID created previously
OIDC_CLIENT_ID=oktomusic-dev

# Client Secret generated by Keycloak
# Retreive it from the 'Credentials' tab of your client
OIDC_CLIENT_SECRET=change-me

# Where Oktomusic should read roles from inside the *access token* (JWT).
#
# For Keycloak, if you created client roles
# (as in this guide), they are typically exposed at:
#   resource_access.<client_id>.roles
# The <client_id> placeholder is replaced with OIDC_CLIENT_ID automatically.
OIDC_ROLES_PATH=resource_access.<client_id>.roles